Application load balancer Demonstration

L
"Success is not final; failure is not fatal."
I don't care if I fail or succeed; I never give up.
Search for a command to run...
No comments yet. Be the first to comment.
"ddrescue got your data off the dying drive. Now what? This is where you actually get it back." 🚑 The Big Picture First A lot of people think ddrescue restores data. It doesn't — not directly. Here
"Your hard drive is making a clicking sound. Your stomach drops. Don't panic — ddrescue has your back." 🤔 What Even Is ddrescue? Imagine your hard drive is a library. Some books are fine. Some are
Most teams treat SELinux as an obstacle. The teams that thrive in production treat it as a superpower. Here's everything you need to know to move from frustrated to fluent. If you've ever Googled a
In this Lab you will get the idea of the following: Created an Amazon EC2 launch template Created an Amazon EC2 Auto Scaling launch configuration Configured scaling policies and created auto Scaling group to scale in and scale out the number of se...
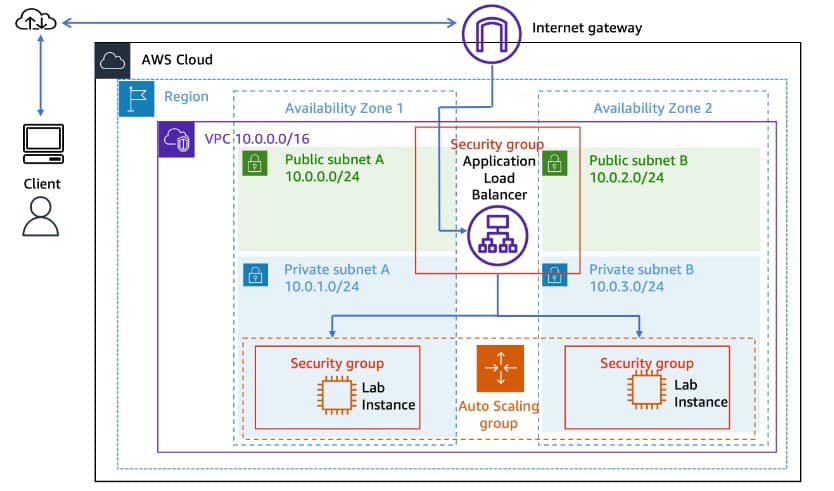
A load balancer serves as the single point of contact for clients. The load balancer distributes incoming application traffic across multiple targets, such as EC2 instances, in multiple Availability Zones. This increases the availability of your application. You add one or more listeners to your load balancer.
[ Reference Source: AWS documentation ]

How to create an EC2 instance with user data
How to make simple VPC
How to make a security group suit for ELB
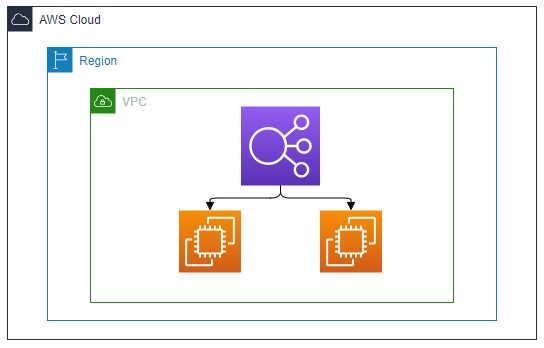
How to configure multiple EC2 with an Application load balancer
Search VPC and create VPC as the following VPC setting:
Resources to create: VPC Only
Name tag - optional: myVPC
IPv4 CIDR: 10.0.0.0/16
Leave all default and Create VPC
Select subnets and create subnets as:
VPC ID: Select myVPC
Subnet Settings: (for subnet1)
Subnet name: subnet1
Availability Zone: Select 1st zone
IPv4 CIDR block: 10.0.0.0/24
Add new subnet
Subnet Settings: (for subnet2)
Subnet name: subnet2
Availability Zone: Select 2nd zone
IPv4 CIDR block: 10.0.1.0/24
( Note: you can add more than 2 subnets also )
Create subnet
Create an internet gateway and attach it to VPC as:
Internet gateway settings
Name tag: myIG
Create internet gateway
Attach to a VPC and select myVPC
Attach internet gateway
Select the route table and Create the route table as:
Route table settings
Name - optional: route
VPC: Select myVPC
Create route table
Select route ID and then go to Routes -> Edit routes -> Add route
Destination: 0.0.0.0/0
Target: Select internet gateway and select that we created
and Save changes
Similarly, Select route ID and then go to Subnet associations -> Edit Subnet associations
Search VPC, scroll down its left sidebar and create a security group as:
Security group name: ELBsecurity
Description: Elastic load balancer use it
VPC: remove existing and select myVPC
Inbound rules:
Add rule
Type: SSH, Source: 0.0.0.0/0
Type: HTTP, Source: 0.0.0.0/0
Outbound rules:
All traffic, Source: 0.0.0.0/0Create security group
Search EC2 and Launch EC2 instance as:
For the first EC2 instance
Name: server1
Create a key-pair or choose any existing key.
Network Setting > Edit
VPC: Select myVPC
Subnet: Select subnet1
Auto-assign public IP: enable
Firewall: Check select existing security group and select ELBsecurity that we created
Leave all default and Expand Advanced details
Go directly to the user data field at last and copy-paste this:
  #!/bin/bash
  sudo yum update -y
  sudo yum install -y httpd
  sudo systemctl start httpd
  echo "<html><body><h1> Hello! I am server1 </h1></body></html>" > /var/www/html/index.html
Launch instance
For the second EC2 instance
Name: server2
Create a key pair or choose any existing key.
Network Setting > Edit
VPC: Select myVPC
Subnet: Select subnet2
Auto-assign public IP: enable
Firewall: Check select existing security group and select ELBsecurity that we created
Leave all default and Expand Advanced details
Go directly to the user data field at last and copy-paste this:
  #!/bin/bash
  sudo yum update -y
  sudo yum install -y httpd
  sudo systemctl start httpd
  echo "<html><body><h1> Hello! I am server2 </h1></body></html>" > /var/www/html/index.html
Launch instance
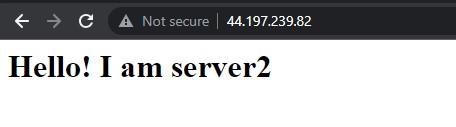
Also, you can check after the 2/2 check passed whether your instances are publically accessible or not by rendering their public IP in a new tab.
For example, server2 public IP gives:
In the left bar of EC2 scroll down and click on Load balancers
Click Create load balancer -> Application load balancer Create
Create Application Load Balancer as:
Basic configuration
Load balancer name: balanceLoad
Leave all default
Network mapping
VPC: Select myVPC
Mappings: Select at least two availability zones for now we have only 2 subnets of different availability zones so select both
Security groups
ELBsecurity and remove the default oneListeners and routing
Default action: Select a target group but we don't have a target group. Our priority is to create a target group, So select Create target group.
[you can also create a target group first and then associate at that point.]
It renders directly to the Create target group or you can select manually at the left bar of the EC2 instance just below the load balancers
{
Create target group as:
Specify group details:
Target group name: targetELB
VPC: myVPC
Protocol version: leave as HTTP1
Leave all default and Next
Register targets
Select both available instances and Click on Ports for the selected instances: 80 and
Include as pending below
Then Create target group
}
Go back to Listeners and routing, refresh, and select targetELB
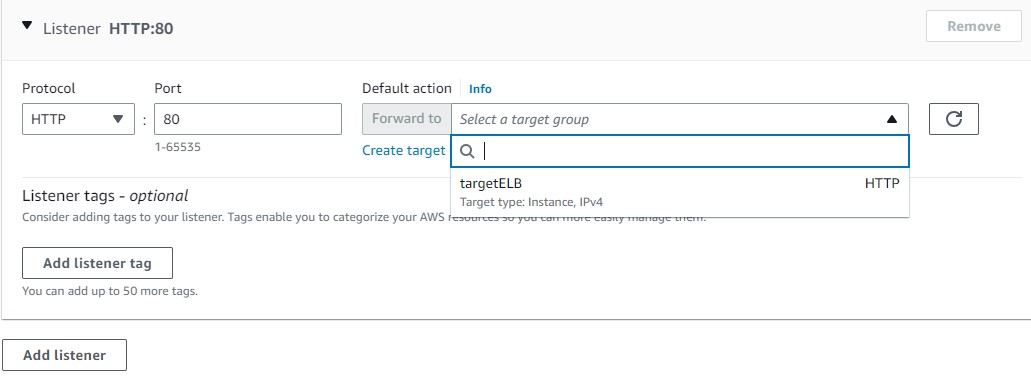
Leaving all default and Create load balancer
Go to load balancer and copy the DNS name of balanceLoad that we created.
Open a new tab of any browser and paste it.
Now, observe by refreshing the tab how the load is distributed.